

By The Hazli Family — Peter & Louise · Reviewed June 2026
Quick answer: Make an air mattress more comfortable for camping by clearing the ground and laying a pad underneath, adding a foam topper and fitted sheets on top, then tuning inflation to your sleeping position — about 85–90% for back sleepers, 70–80% for side sleepers. Test it for 5–10 minutes and re-inflate each morning.
Every parent faces the challenge of turning a camping trip into a comfortable experience, especially when sleeping on an air mattress. Outdoor nights in places like the Pacific Northwest or the American Southwest can be unpredictable, so the right campsite matters for both safety and rest. This guide offers practical steps—from assessing ground conditions to layering and adjusting mattress firmness—that help families achieve a cozy, restful sleep during weekend getaways.
Table of Contents
- Step 1: Assess Your Campsite and Mattress Setup
- Step 2: Add Layers and Support for Extra Comfort
- Step 3: Adjust Inflation for Personalized Firmness
- Step 4: Test Comfort and Make Final Tweaks
Quick Summary
| Key Point | Explanation |
|---|---|
| 1. Assess Ground Conditions First | Examine the campsite for hazards like rocks and uneven ground to ensure a comfortable sleeping surface. |
| 2. Layer for Maximum Comfort | Use a sleeping pad and foam topper on your air mattress to enhance insulation and cushioning for a better night’s sleep. |
| 3. Adjust Mattress Inflation Accordingly | Inflate your mattress based on your sleeping position to optimize support and comfort. |
| 4. Test Comfort Before Sleeping | Lie on the mattress for 5-10 minutes to identify and fix any comfort issues before the night’s rest. |
| 5. Keep Adjustment Tools Handy | Have extra blankets, a portable pump, and padding accessible for quick adjustments to ensure a restful night. |
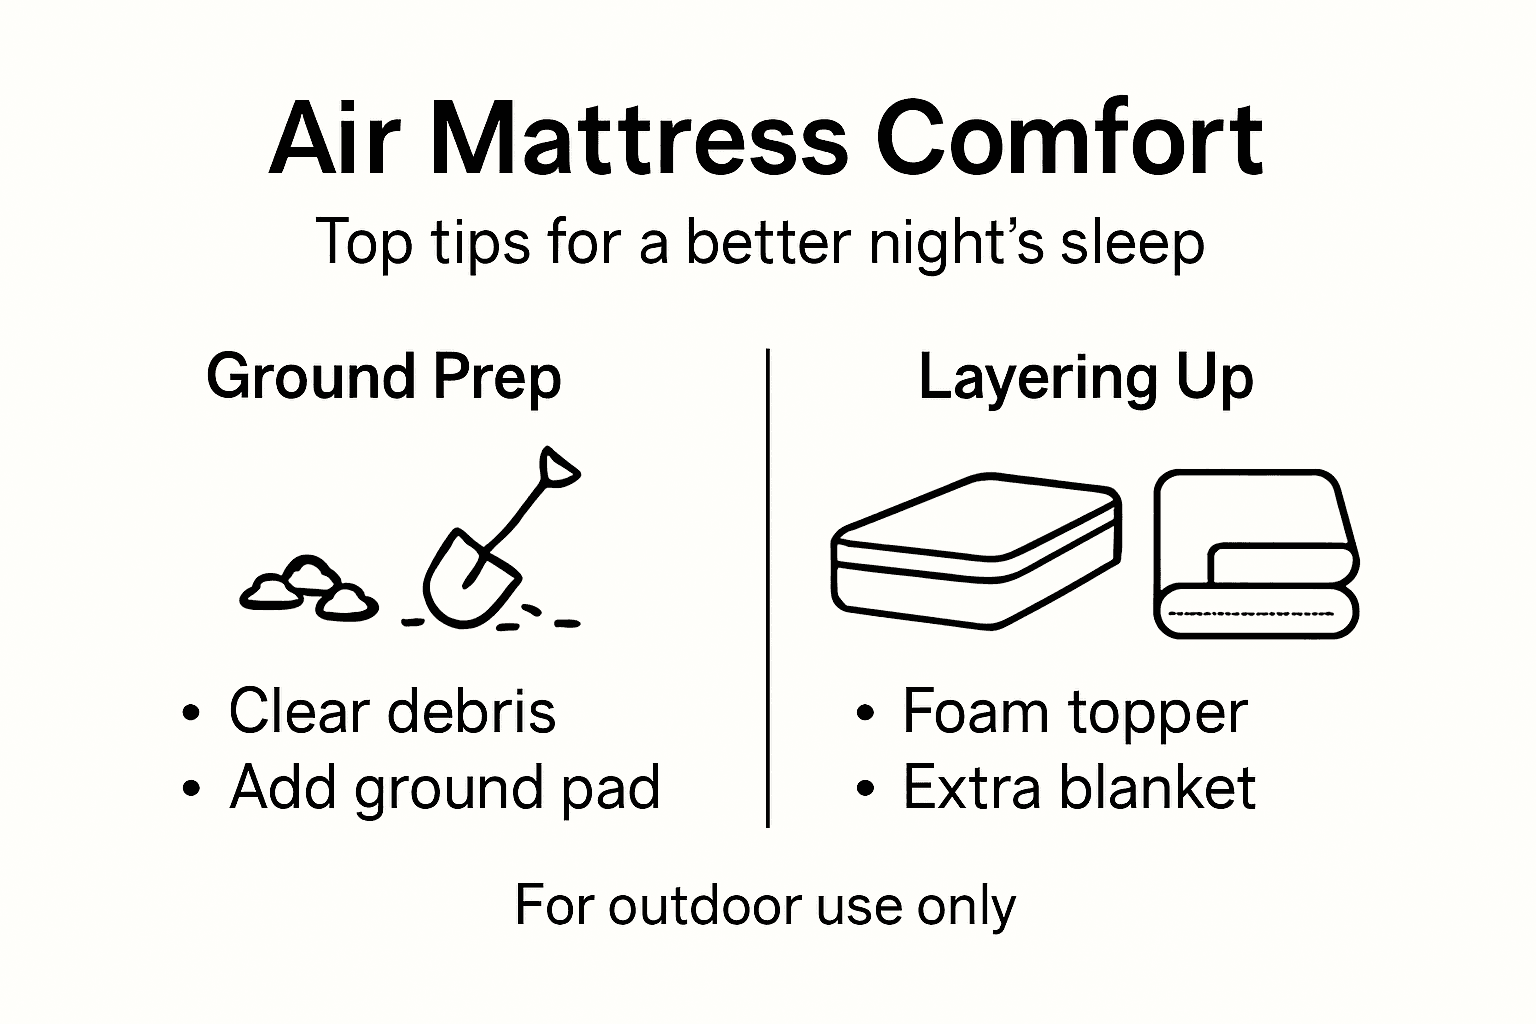
Step 1: Assess Your Campsite and Mattress Setup
Before you pitch your tent or lay down your air mattress, take time to examine your chosen campsite. The right location makes the difference between a restful night and hours of tossing and turning on an uncomfortable surface.
Start by walking around your potential sleeping area and look for hazards. Check for rocks, sticks, roots, or uneven ground that could puncture your mattress or create uncomfortable lumps beneath you.
Ground conditions matter tremendously. A flat, debris-free surface is your first line of defense against a bad night’s sleep. Spend a few minutes clearing away anything sharp or hard from your immediate sleeping zone.
Consider these key factors when selecting and preparing your spot:
- Flatness: Choose the most level ground available, even if it means moving your tent slightly
- Drainage: Avoid low-lying areas that collect water or feel damp to the touch
- Wind protection: Position your setup away from exposed ridges or open areas where cold wind penetrates
- Proximity to water: Camp near water sources for convenience, but not so close that insects gather or flooding becomes a risk
- Shade availability: Morning sun is nice, but afternoon shade keeps your mattress from overheating
A smooth, clean sleeping surface prevents punctures and creates a surprisingly comfortable base for your air mattress.
Once you’ve selected your spot, prepare the ground properly. Lay down a ground cloth or sleeping pad before inflating your air mattress. This protective layer shields your mattress from sharp objects and moisture while adding insulation from the cold earth below.
When using a proper camping sleep setup, you’ll notice that ground preparation takes just 10 minutes but pays dividends throughout the night. Your back will thank you.
Here’s how ground conditions affect sleep quality on an air mattress:
| Condition | Impact on Sleep | Prevention Strategy |
|---|---|---|
| Uneven ground | Causes pressure points | Clear debris, select flat area |
| Damp soil | Chills and condensation | Use a waterproof ground cloth |
| Exposed location | Cold, windy nights | Set up behind natural barriers |
| Proximity to water | Insects and moisture risk | Choose moderate distance |
| Afternoon sun | Overheats mattress | Opt for partial shade |
Pro tip: Scout your campsite in daylight and physically lie down on your chosen spot for 30 seconds to feel for rocks or uncomfortable bumps before setting up your tent and mattress.
Step 2: Add Layers and Support for Extra Comfort
Your air mattress alone won’t provide the cushioning and insulation your body needs for a good night’s sleep. Strategic layering transforms a firm, cold surface into a genuinely comfortable sleeping platform.
Start by placing a sleeping pad or insulated mat directly on the ground beneath your air mattress. This protective layer serves double duty: it prevents cold from seeping up through the earth and shields your mattress from punctures caused by sharp objects.
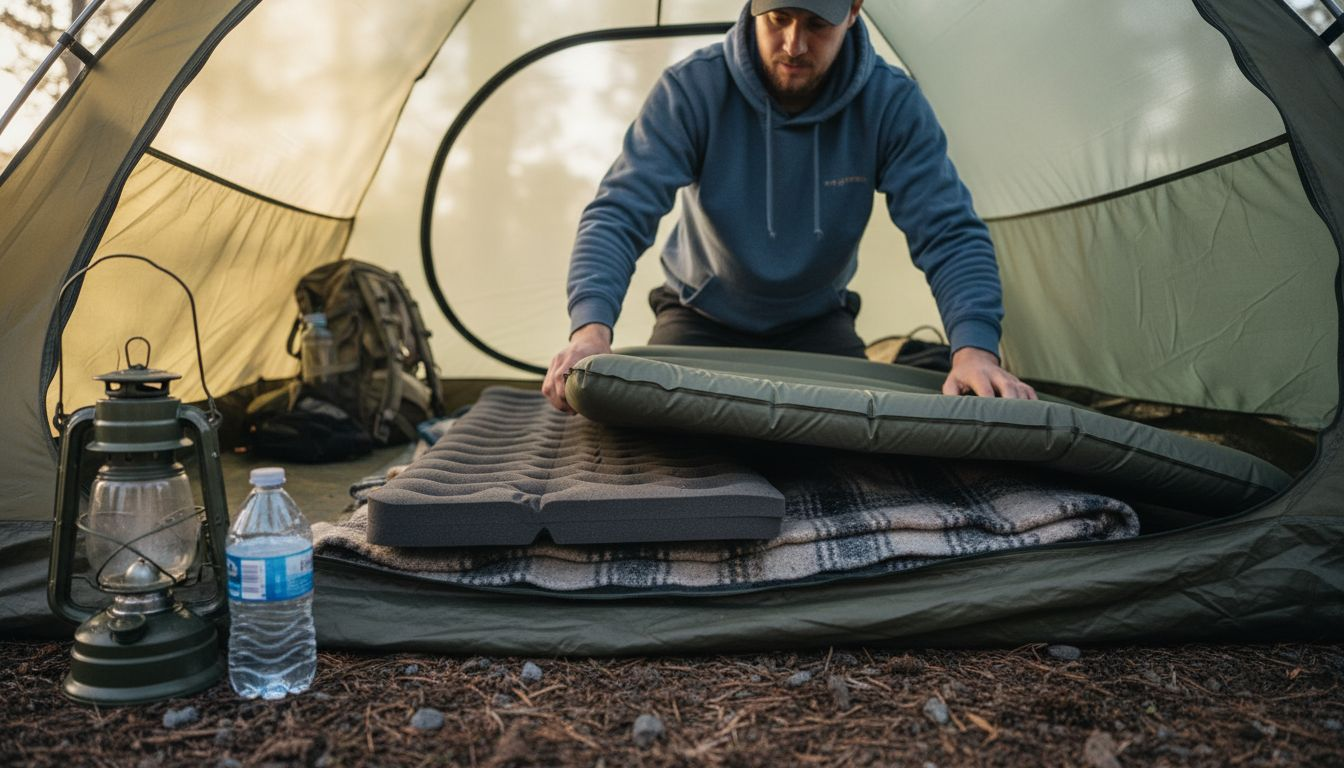
Next, add a foam mattress topper or thick blanket on top of your air mattress. These soft layers reduce the firmness of the mattress and create the cushioning sensation closer to a traditional bed. A foam topper is especially effective because it conforms to your body’s shape and distributes your weight more evenly.
Consider these layering components for maximum comfort:
- Sleeping pad: Provides insulation and puncture protection from below
- Foam topper: Adds cushioning and reduces the plastic feel of bare air mattresses
- Fitted sheets: Regulate temperature and prevent the cold sensation of direct contact with the mattress
- Blankets and quilts: Create warmth and add soft texture between you and the mattress
- Pillow or DIY head support: Fill a stuff sack with clean clothes for comfortable neck support
Layering is the secret to transforming an air mattress from merely functional to genuinely restful.
When adding proper comfort layers to your mattress, you’ll notice the difference immediately. The combination of insulation below and cushioning above creates a sleeping surface that rivals home bedding.
Temperature regulation matters too. Air mattresses can feel cold because the plastic conducts heat away from your body. Fitted sheets and quality blankets trap warm air and keep that cold feeling at bay throughout the night.
Pro tip: Bring a thick yoga mat or camping pad as your bottom layer and a soft foam topper as your top layer, then sandwich your air mattress between them for maximum comfort and protection.
Step 3: Adjust Inflation for Personalized Firmness
Not everyone sleeps the same way, and your air mattress should adapt to your preferences. The beauty of an air mattress is that you control the firmness level by adjusting how much air you pump in.
Start by inflating your mattress to a moderate level, somewhere around 75% of maximum capacity. This balanced approach gives you room to fine-tune in either direction based on how your body feels.
Now comes the personal experimentation. Lie down on your mattress and pay attention to how it feels. Does your lower back feel properly supported, or does it sag uncomfortably? Are you sinking too deeply into the surface, or does it feel too firm?
Different sleeping positions call for different inflation levels:
- Back sleepers: Need firm support to maintain spinal alignment, so aim for 85 to 90% inflation
- Side sleepers: Prefer slightly softer surfaces that cushion shoulders and hips, so 70 to 80% works better
- Stomach sleepers: Generally want firmness to prevent sagging in the middle, so inflate closer to 90%
- Combination sleepers: Start at 80% and adjust based on your most common position
Finding your ideal firmness level takes just 15 minutes of adjustment but pays off every night you camp.
Throughout your trip, check your mattress inflation daily. Air naturally leaks out over time, especially when you’re sleeping on it. Morning re-inflation ensures you maintain consistent comfort night after night.
Use this comparison to find your ideal air mattress firmness:
| Sleeping Position | Recommended Firmness | Comfort Considerations |
|---|---|---|
| Back sleeper | 85-90% inflated | Maintains spinal alignment |
| Side sleeper | 70-80% inflated | Less pressure on hips/shoulders |
| Stomach sleeper | 90% inflated | Prevents midsection sagging |
| Combo sleeper | Start at 80% | Adjust for primary preference |
Most modern air mattresses feature built-in pumps for easy inflation adjustments, making it simple to add or release air without extra equipment. If your mattress lacks this feature, a portable hand pump takes minimal space in your gear.
Don’t hesitate to make micro-adjustments. A few extra pumps or releasing a bit of air can transform an uncomfortable night into a restful one.
Pro tip: Wait at least 30 minutes after setting up your mattress before final inflation adjustment, as the material stretches and settles, which affects how firm it feels.
Step 4: Test Comfort and Make Final Tweaks
Before you settle in for the night, spend a few minutes actually lying on your mattress to identify any issues. This simple test reveals pressure points and discomfort you might not notice until you’re already trying to sleep.
Lie down in your normal sleeping position for at least 5 to 10 minutes. Notice where your body contacts the mattress. Do you feel any hard spots beneath you? Does your lower back have proper support, or does it feel unsupported?
Pay close attention to these common problem areas:
- Lower back and hips: Check for sagging or gaps between your body and the mattress
- Shoulders and neck: Feel whether you’re sinking too deeply or sitting too high
- Knees and ankles: Notice if your legs are properly supported or hanging uncomfortably
- Overall temperature: Assess whether you feel cold from below or overheated from your layers
Comfort testing now prevents uncomfortable adjustments at midnight when you’d rather be sleeping.
If you discover discomfort during this test, don’t assume you’ll adjust to it. Make changes immediately. Testing your sleeping arrangement thoroughly before committing to the night is the smartest approach.
Common quick fixes address most issues. If your back sags, add more inflation to the mattress. If the surface feels too firm, add an extra blanket or pillow under pressure points. If you’re cold, layer more insulation between you and the ground.
Keep your adjustment tools within arm’s reach before you settle in completely. A portable pump, extra blankets, and additional padding should be accessible without leaving your tent. This way, if you wake up uncomfortable at 2 a.m., you can make a quick adjustment without fumbling around in the dark.
Pro tip: Set a phone alarm for 15 minutes after you lie down and test again, as mattresses settle and feel different after your body weight has compressed them slightly.
Elevate Your Camping Comfort With Hazli Collection
Struggling to make your air mattress feel truly comfortable while camping is a common challenge. From choosing the right ground spot to perfecting mattress firmness and adding layers of cushioning, every detail counts in achieving restful sleep outdoors. If you want to eliminate pressure points, stay warm, and wake up refreshed, it is time to explore solutions that go beyond just inflating your mattress.

Discover how our Memory Foam Waterproof Camping Mattresses | HazliCollection.com bring unbeatable comfort and support for every camping night. These mattresses combine durable waterproof design with the cushioning your body craves, solving problems like uneven ground and cold surfaces instantly. Pair your sleep setup with quality gear from our Car Camping Essentials and Camping and Travel Products collections to build a camping experience you can trust. Take control of your sleep comfort today at https://hazlicollection.com and start camping with the confidence that comes from truly restful nights.
Frequently Asked Questions
How can I assess my campsite for air mattress comfort?
To assess your campsite for air mattress comfort, look for a flat and debris-free surface. Clear away any rocks, sticks, or roots that could create lumps or puncture your mattress before setting it up.
What layers should I add under my air mattress for better comfort while camping?
Add a sleeping pad or insulated mat directly under your air mattress for cushioning and insulation from the cold ground. This layer helps prevent punctures and cold drafts, enhancing your overall sleeping experience.
How do I determine the right inflation level for my air mattress?
To find the right inflation level, start by inflating your air mattress to about 75% of its maximum capacity. Lie down and adjust the firmness according to your sleeping position so that you feel supported without sinking too deeply or feeling too firm.
What final adjustments can I make to ensure my air mattress is comfortable before sleeping?
Before sleeping, lie on your mattress for 5 to 10 minutes to identify any pressure points or discomfort. Make immediate adjustments, such as adding air for back support or extra blankets for insulation, to optimize your comfort level.
How can I maintain air mattress firmness throughout my camping trip?
Check your mattress inflation daily, as air can naturally leak out overnight. Inflate your mattress again each morning to ensure consistent comfort, allowing for a restful night’s sleep each evening.
Recommended
- How to Make My Camp Bed More Comfortable? 7 Smart Tips for Better Outd – Hazli Collection
- How to Make Camping Bed More Comfortable for Better Sleep – Hazli Collection
- How to Choose Camping Mattress for Ultimate Comfort – Hazli Collection
- How to Repair a Camp Mattress for Lasting Comfort Outdoors – Hazli Collection