Keeping your outdoor mattress clean is more than just a comfort issue. Nearly 70 percent of outdoor mattress owners report that proper cleaning extends the life of their gear by several years. Most people think a quick wipe-down is all it takes. The truth is, a few precise cleaning steps can make your mattress last much longer and stay fresher than you ever expected.
Table of Contents
- Step 1: Gather Necessary Cleaning Supplies
- Step 2: Remove Bedding and Prepare the Mattress
- Step 3: Clean the Mattress Surface Thoroughly
- Step 4: Dry Completely Before Storage
- Step 5: Inspect for Damage and Repair as Needed
Quick Summary
| Key Point | Explanation |
|---|---|
| 1. Gather suitable cleaning supplies | Compile essential tools like soft brushes, mild detergent, and microfiber cloths for effective outdoor mattress cleaning. |
| 2. Remove bedding carefully | Strip all bedding and inspect the mattress for stains or damage, ensuring a thorough cleaning process. |
| 3. Clean with gentle solutions | Use a mild detergent and avoid harsh chemicals, applying solutions carefully to prevent mattress damage. |
| 4. Ensure complete drying | Dry the mattress in a well-ventilated area to prevent moisture retention, mold, and mildew growth. |
| 5. Inspect for damage regularly | Conduct thorough checks for tears or wear, and perform repairs promptly to maintain mattress integrity. |
Step 1: Gather Necessary Cleaning Supplies
Preparing for outdoor mattress maintenance requires thoughtful organization and strategic selection of cleaning tools. Before diving into the cleaning process, understanding the specific requirements of your outdoor mattress will help streamline your approach and protect your investment.
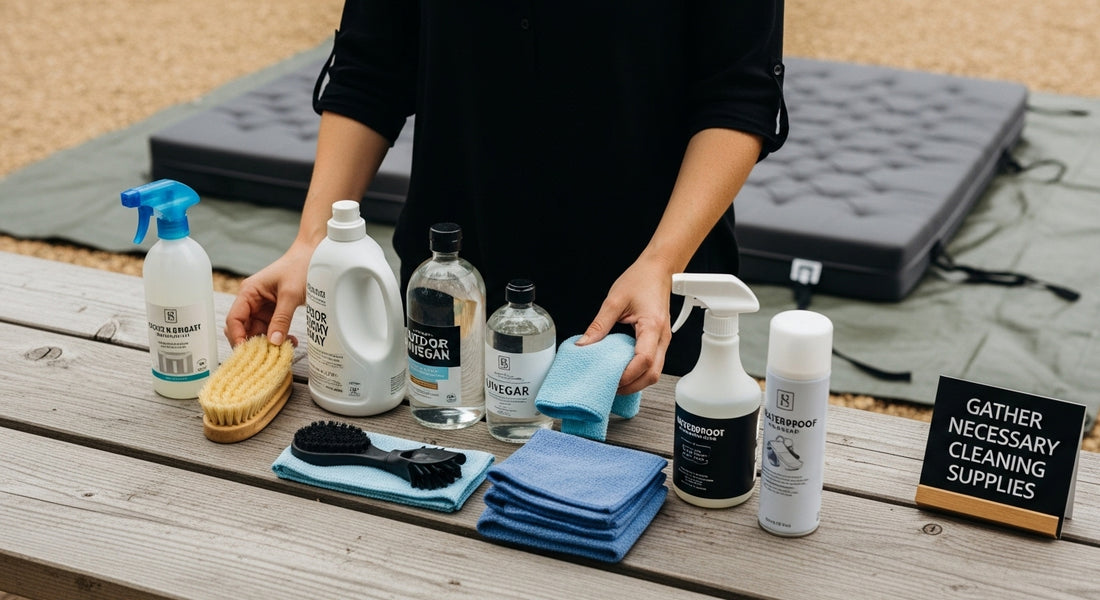
Start by assembling a comprehensive cleaning kit tailored specifically for outdoor mattress care. Professional cleaning experts recommend gathering the following essential items to ensure a thorough and effective cleaning process:
- Soft bristle brush
- Mild detergent specifically designed for outdoor fabrics
- White distilled vinegar
- Clean microfiber cloths
- Spray bottle
- Warm water
- Waterproof protective spray
- Optional: Enzyme cleaner for tougher stains
Select cleaning solutions that are gentle yet effective, avoiding harsh chemicals that could potentially damage the mattress fabric or compromise its waterproof properties. Our complete camp mattress cleaning guide provides additional insights into selecting appropriate cleaning products that maintain mattress integrity.
Consider the specific material of your outdoor mattress when choosing cleaning supplies. Memory foam and specialized outdoor mattresses often require more delicate treatment compared to standard camping mattresses. Synthetic materials might tolerate stronger cleaning solutions, while natural fiber mattresses demand more nuanced care. Always check manufacturer recommendations before applying any cleaning solution.
Preparing your workspace is equally important. Choose a clean, flat surface with good air circulation where you can thoroughly inspect and clean your mattress. Ideally, this area should be outdoors or in a well-ventilated space to allow for complete drying and prevent moisture retention. Spread out a clean tarp or plastic sheet to protect the surface beneath your mattress during the cleaning process.
By meticulously gathering the right supplies and understanding your mattress’s specific needs, you set the foundation for an effective cleaning routine that will extend the life of your outdoor sleeping surface and maintain its comfort and performance.
To help you gather all necessary supplies efficiently, here is a table describing the recommended tools and their specific purposes for cleaning and maintaining your outdoor mattress.
| Supply | Recommendation/Type | Purpose/Use |
|---|---|---|
| Soft bristle brush | Gentle, non-abrasive | Removes surface dirt and debris |
| Mild detergent | Outdoor fabric specific, non-bleach | Cleans stains without damaging materials |
| White distilled vinegar | Standard, food-grade | Natural stain remover and deodorizer |
| Microfiber cloths | Lint-free, soft texture | Blotting and wiping surfaces without abrasion |
| Spray bottle | Clean, adjustable nozzle | Applies cleaning solutions evenly |
| Warm water | Not too hot | Dilutes cleaning solutions safely |
| Waterproof protective spray | Outdoor gear compatible | Adds protective coating after cleaning |
| Enzyme cleaner (optional) | For difficult stains | Treats tough organic stains |
Step 2: Remove Bedding and Prepare the Mattress
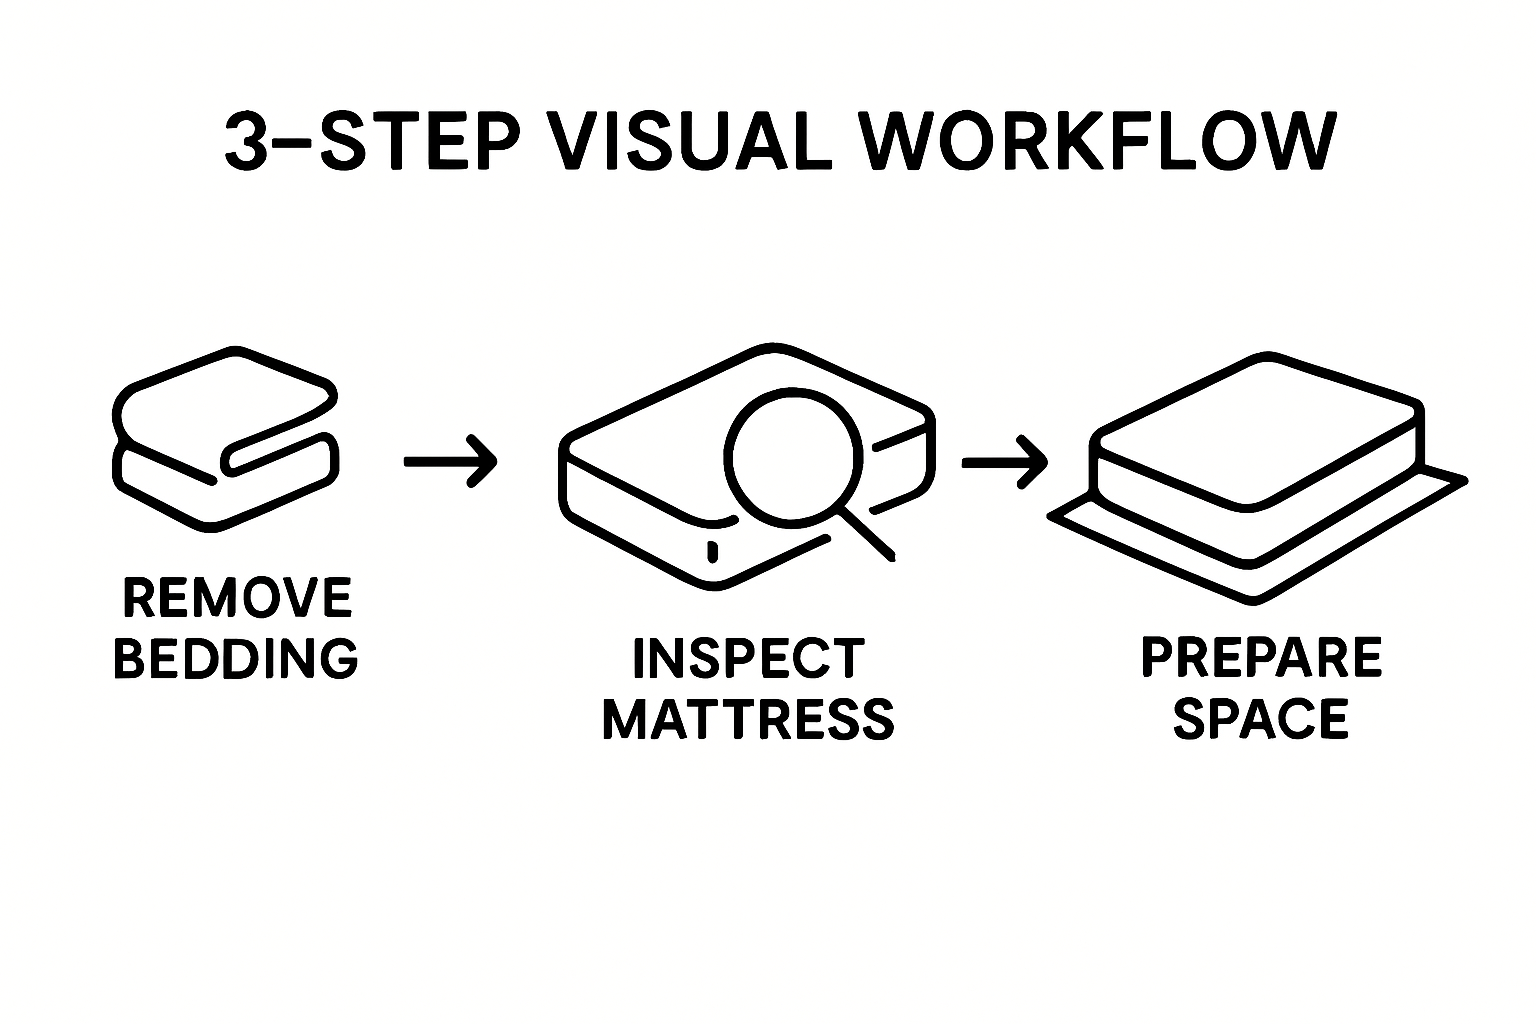
Removing bedding and preparing your outdoor mattress for cleaning requires a systematic and careful approach. This crucial step sets the foundation for a thorough and effective cleaning process, ensuring that every surface of your mattress receives proper attention. Proper bedding removal and mattress preparation protect your investment and maintain its long-term performance.
Begin by carefully stripping all bedding materials from the mattress. Remove sheets, blankets, sleeping bags, and any protective covers with gentle movements. Shake out these items separately to eliminate loose dirt and debris before setting them aside for individual washing. Check out our camp bedding organization guide for additional tips on managing outdoor sleeping accessories.
As you remove the bedding, conduct a preliminary inspection of the mattress surface. Look for visible stains, dirt accumulation, and areas of potential wear or damage. Pay special attention to corners, seams, and edges where grime tends to collect. Note any specific areas that might require extra cleaning attention during the subsequent steps.
Once the mattress is completely exposed, position it on a clean, flat surface with excellent air circulation. Choose a location that allows you to work comfortably and provides enough space to maneuver around the entire mattress. Outdoor cleaning is ideal, but ensure the area is free from direct sunlight and potential contamination.
Prepare your workspace by laying down a clean, waterproof tarp or plastic sheet to protect the ground beneath the mattress. This prevents additional dirt transfer and provides a clean working surface. If your mattress is particularly large or heavy, consider asking a partner to help you move and position it safely.
Before proceeding with cleaning, conduct a final visual and tactile examination. Run your hands gently across the mattress surface to detect any hidden debris, loose threads, or potential areas of concern. Identifying these details now will help you customize your cleaning approach and avoid potential damage during the washing process.
By meticulously removing bedding and preparing your outdoor mattress, you create an optimal environment for thorough cleaning. This step ensures that every subsequent cleaning action will be more effective, helping to preserve the mattress’s comfort, durability, and performance for future outdoor adventures.

Step 3: Clean the Mattress Surface Thoroughly
Cleaning your outdoor mattress requires a methodical and gentle approach that preserves its structural integrity while removing dirt, stains, and potential contaminants. The goal is to restore your mattress to its original condition without causing damage to its delicate materials.
Begin the cleaning process by using a handheld vacuum with a soft brush attachment to meticulously remove loose debris, dust, and particles. Move the vacuum slowly and deliberately across the entire surface, paying extra attention to seams, corners, and textured areas where dirt tends to accumulate. According to Sleep Foundation cleaning guidelines, this initial vacuuming step is crucial for preparing the mattress surface for deeper cleaning.
Create a gentle cleaning solution by mixing warm water with a small amount of mild detergent specifically designed for outdoor fabrics. Avoid using harsh chemicals or bleach-based cleaners that could compromise the mattress material. Mix the solution in a clean spray bottle, ensuring it is well-blended but not overly sudsy.
Approach spot cleaning with precision and care. For specific stains, apply the cleaning solution directly to a clean microfiber cloth rather than spraying it onto the mattress surface. Gently blot the stained area using a light, circular motion, taking care not to saturate the material. Work from the edges of the stain toward the center to prevent spreading and minimize potential damage.
For more stubborn stains, create a specialized cleaning mixture using white vinegar and water in equal proportions. This natural solution helps break down organic stains and neutralizes odors without introducing harsh chemicals. Test the solution on a small, inconspicuous area first to ensure it does not discolor or damage the mattress fabric.
Once you have addressed specific stains, use a clean, damp microfiber cloth to perform an overall surface cleaning. Wipe down the entire mattress using light, sweeping motions, ensuring even coverage while avoiding excessive moisture. The cloth should be slightly damp, not soaking wet, to prevent water from penetrating deep into the mattress materials.
As a final step, allow the mattress to air dry completely in a well-ventilated area away from direct sunlight. Position the mattress on its side or at a slight angle to promote thorough drying and prevent moisture retention. Proper drying is critical to preventing mold and mildew growth, which can compromise the mattress’s performance and longevity.
By following these detailed cleaning instructions, you will effectively restore your outdoor mattress, maintaining its comfort, cleanliness, and durability for many future adventures.
Step 4: Dry Completely Before Storage
Drying your outdoor mattress thoroughly is a critical step that prevents potential damage, mold growth, and unpleasant odors. Proper drying ensures the longevity and performance of your mattress, protecting your investment in outdoor comfort. According to Sleep Junkie mattress care guidelines, effective drying is essential for maintaining mattress quality.
Position the mattress in a well-ventilated area with optimal air circulation. If possible, choose an outdoor location that offers indirect sunlight and gentle breezes. Avoid direct, intense sunlight, which can potentially damage or fade certain mattress materials. Lean the mattress at a slight angle to promote maximum air exposure and prevent moisture from pooling.
Utilize fans to accelerate the drying process, especially if outdoor conditions are humid or limited air movement is available. Place multiple fans around the mattress, positioning them to create cross ventilation. Rotate the mattress periodically to ensure all surfaces dry evenly, paying special attention to seams and corners where moisture can become trapped.
Perform periodic moisture checks during the drying process. Press a clean, dry white towel against various sections of the mattress to detect any remaining dampness. If the towel shows any moisture or discoloration, continue the drying process. A completely dry mattress will feel crisp and cool to the touch, with no signs of residual dampness.
Consider using a moisture-absorbing material like silica gel packets or a dehumidifier near the mattress to expedite moisture removal. These tools help extract ambient humidity and prevent potential mildew formation. Place these moisture-absorbing elements strategically around the mattress without directly touching the surface.
Drying time can vary depending on environmental conditions, mattress thickness, and material composition. Generally, expect the process to take between 4 to 8 hours. Outdoor mattresses with quick-dry technologies might dry faster, while memory foam or dense materials could require longer drying periods.
Before storing the mattress, conduct a final comprehensive inspection. Look for any remaining damp spots, unusual odors, or signs of incomplete drying. If you detect any moisture, continue the drying process or use a clean, dry cloth to absorb remaining dampness. Only store the mattress once it is completely dry to prevent potential mold or mildew growth.
By meticulously following these drying instructions, you protect your outdoor mattress from moisture-related damage and ensure it remains in pristine condition for your next outdoor adventure.
Step 5: Inspect for Damage and Repair as Needed
Inspecting your outdoor mattress for damage is a critical maintenance step that preserves its performance, comfort, and longevity. A thorough examination can prevent minor issues from escalating into major problems that could compromise your mattress’s structural integrity. Careful inspection requires a systematic approach and keen attention to detail.
Begin by spreading the mattress on a clean, flat surface with excellent lighting. Natural daylight provides the best illumination for detecting subtle imperfections. Run your hands slowly across the entire surface, feeling for irregularities such as small tears, loose threads, compressed areas, or unexpected bumps that might indicate underlying damage.
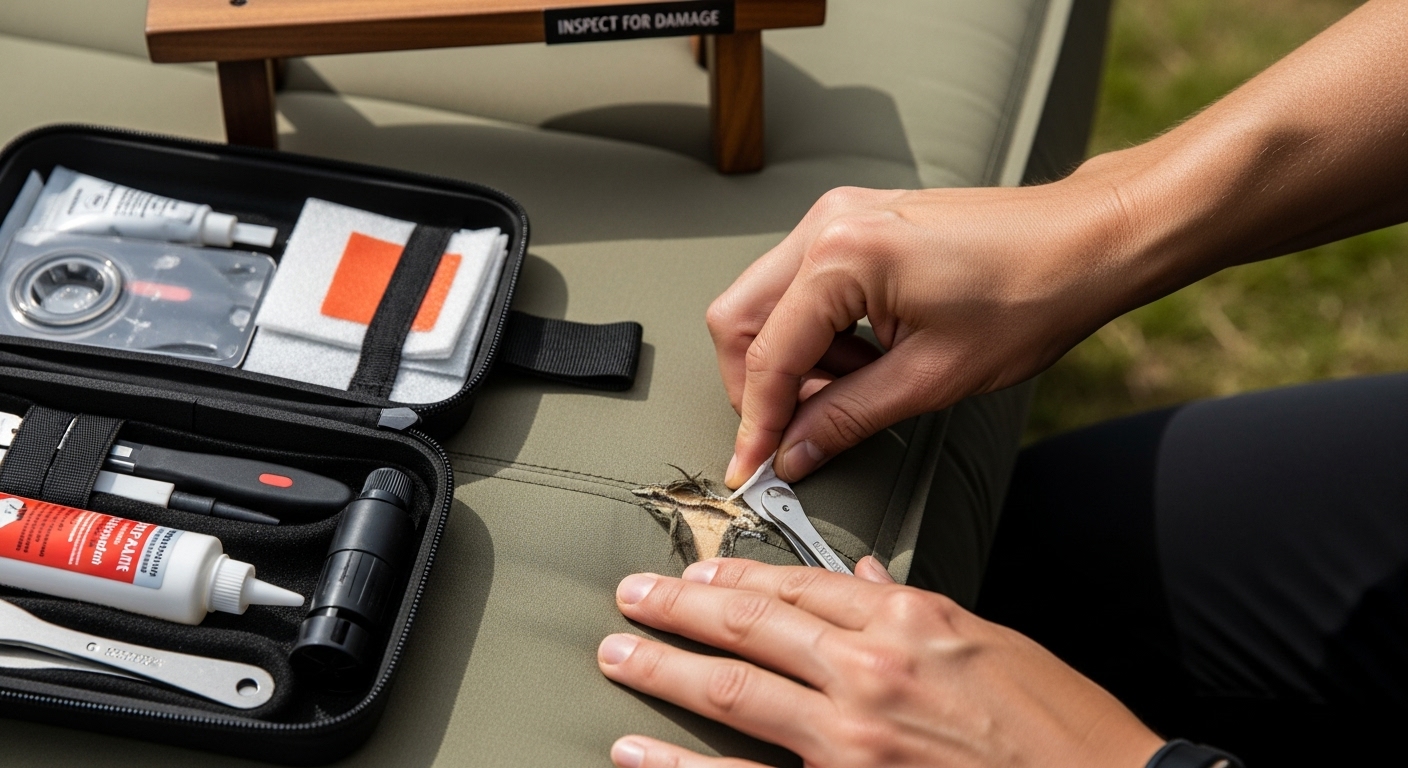
Visually inspect the mattress from multiple angles, looking closely at high-stress areas like seams, corners, and edges. Check for signs of wear, fraying, or material breakdown. Pay special attention to areas that frequently contact the ground or experience significant pressure during use. Small punctures or weak points can quickly develop into larger tears if not addressed promptly.
For minor fabric tears or small holes, consider using a specialized outdoor gear repair kit. These kits typically include patch materials designed specifically for outdoor equipment fabrics. Apply patches following the manufacturer’s instructions, ensuring a clean, dry surface and proper adhesion. Press firmly and allow sufficient curing time to guarantee a secure repair.
If your mattress has any foam or cushioning layers, inspect them for compression, uneven wear, or potential moisture damage. Gently press different areas to check for consistent resilience and support. Significant indentations or areas that do not bounce back may indicate internal structural compromise requiring professional assessment or potential replacement.
Document any discovered damage through photographs, which can be useful for warranty claims or tracking the mattress’s condition over time. If repairs are beyond your skill level or the damage appears extensive, consult the manufacturer or a professional outdoor gear repair service.
Consider applying a waterproof sealant or protective spray to reinforce areas of potential weakness. These products can provide an additional layer of protection against future wear and environmental challenges. Always test protective treatments on a small, inconspicuous area first to ensure compatibility with your mattress material.
By meticulously inspecting and addressing potential damages, you extend the life of your outdoor mattress and ensure continued comfort and reliability during your adventures.
Below is a checklist table summarizing key steps and verification points for outdoor mattress care to help ensure nothing is missed during regular maintenance.
| Step | What to Verify | Completion Criteria |
|---|---|---|
| Gather Supplies | All cleaning tools and solutions are present | Cleaning kit is fully assembled |
| Remove Bedding & Prepare | Bedding is stripped, workspace is set up | Mattress is fully exposed and ready |
| Clean Surface | Stains and debris are addressed | Mattress surface is clean and residue free |
| Dry Thoroughly | No damp spots or musty odors remain | Mattress feels crisp and completely dry |
| Inspect & Repair | No tears, holes, or compressed spots detected | Mattress passes visual and tactile inspection |

Upgrade Your Outdoor Sleep Experience with Hazli Collection
After following these essential care instructions, you know how much effort it takes to maintain your outdoor mattress’s comfort, cleanliness, and longevity. Despite the best cleaning routines, stains, moisture, and wear can still threaten your relaxation every time you head outdoors. Too many campers struggle to preserve their mattress’s support and freshness no matter how carefully they gather supplies, remove bedding, clean, or repair damage. Hazli Collection understands these challenges and offers a smarter solution to truly enjoy your adventures.

Why settle for endless cleaning cycles when high-quality, memory foam camping mattresses can save you time and improve your comfort? Discover our expertly designed products, including waterproof covers and durable, easy-to-clean fabrics. Each Hazli mattress is built for hassle-free maintenance and reliable use in any outdoor setting. Visit Hazli Collection now to explore our selection. Make your next trip easier and start enjoying the outdoors with gear that’s truly built for comfort and convenience.
Frequently Asked Questions
How do I properly clean my outdoor mattress?
To clean your outdoor mattress, start by removing all bedding and vacuuming the surface to eliminate dust and debris. Use a mild detergent mixed with warm water in a spray bottle for spot cleaning stains. Blot the stains gently with a microfiber cloth and wipe down the surface using a damp cloth. Allow the mattress to air dry completely in a well-ventilated area before storage.
What supplies do I need for outdoor mattress care?
Essential supplies for outdoor mattress care include a soft bristle brush, mild detergent specifically for outdoor fabrics, white distilled vinegar, clean microfiber cloths, a spray bottle, warm water, and a waterproof protective spray. Consider special cleaning solutions for tougher stains or specific mattress materials.
How can I dry my outdoor mattress quickly?
To dry your outdoor mattress quickly, place it in a well-ventilated area with indirect sunlight and use fans to promote air circulation. Lean the mattress at an angle and periodically check for dampness with a clean towel. Ensure it is completely dry before storing to prevent mold and mildew.
What should I look for when inspecting my outdoor mattress?
During inspection, check for visible damage like tears, fraying, and compressed areas. Focus on seams, corners, and edges where wear is common. Ensure foam or cushioning layers maintain consistent resilience. Address any minor repairs promptly to prevent further deterioration.

